Introduction
What is CSR, SSG, SSR?
CSR, SSG, SSR are different ways of rendering and building a website.
Client side rendering (CSR) is what we have traditionally done in the past. It is a single page app that builds assets and doesn’t require a server. It renders a blank html page except for a root div that will later get hydrated into. For this reason it is not great for SEO because none of the content is there on page load. Also all its fetching is done client side to external servers.
Static site generation (SSG) has been a more recent movement. It is an approach that builds static html files at build time that can then be deployed to a cdn. All data fetching is done at build time and gets included in the built html files. No server is required in this case, and it is good for SEO because the entire page is there on load. A good thing to remember is these can still be fairly dynamic, but it will serve the same content to every user.
Server side rendering (SSR) is what we will mostly talk about today. It is your more typically old school approach of having server rendered pages that are dynamic and serve content at runtime instead of build time. It requires a server and is also good for SEO. This is what more legacy apps using Laravel, Django, etc use. The benefit of Next and Remix is you can use the same language on the frontend and backend.
React Framework Timeline
So now that we know a bit more about the different types of rendering concepts, we can discuss how this pertains to existing React frameworks.
Probably still one of the more popular ways to get a React app running is Create React App. This is a CSR type of framework where no node server is needed. It mainly sets up a boilerplate project for you to get started quickly.
Then came along Gatsby which popularized the SSG way of thinking along with hosting companies such as Vercel and Netlify. One of the biggest pros was blazing fast performance due to hosting on a cdn, and the large ecosystem of plugins it has. The plugin system is still a heavy advantage it has over competitors. The downside is it has a complicated learning curve which is why most people prefer Next or Remix.
Speaking of Next, it helped bring a hybrid mental model to the mainstream. You could do SSG or SSR on a per page basis! Kinda mind blowing 🤯.
Then lastly Remix came around. It took the approach of being SSR only which has sparked some debate. Typically it has been said the static sites will always be faster, but Remix has challenged that idea.
We will go more in depth into Next vs Remix shortly.
Why do you need a Next or Remix?
Using Next or Remix has the following advantages:
• Templated project structure
• File based routing
•
Easier data fetching
• Simplified data writes
• Api
routes
• Improved error handling
• Increased performance
One downside I will quickly mentioned with these more hybrid frameworks is that it blurs the line between frontend and backend. This is especially tricky for environment variables as you try not to expose them on the frontend. Also knowing when your in node and can connect to a db as opposed to a frontend component is important.
Quickstart Compare
To give you a quick overview of some concepts from these two frameworks take a look at the following comparison.
• npx create-next-app@latest --typescript
• SWC for
compiling/bundling
• Page routes in pages
• Api routes
in pages/api
• getServerSideProps (similar to Remix loader)

• npx create-remix@latest
• Esbuild for
compiling/bundling
• Page routes in app/routes
• Api
routes in app/routes with only loader
• loader
•
action (nothing similar in Next)
Building A Web Application (side by side)
Today we will be building a todo list to introduce you to some concepts these frameworks provide. It will have the ability to list todo items, as well as delete and add. Instead of inputting the todo item yourself we will pull from the bored api.
Templated project structure
So one thing these frameworks give you is a templated project structure. They both get you started with an eslint config, typescript, and a compiler.
Below you can see the commands to bootstrap and start a dev server for each.
npx create-next-app@latest --typescript
cd my-app
yarn dev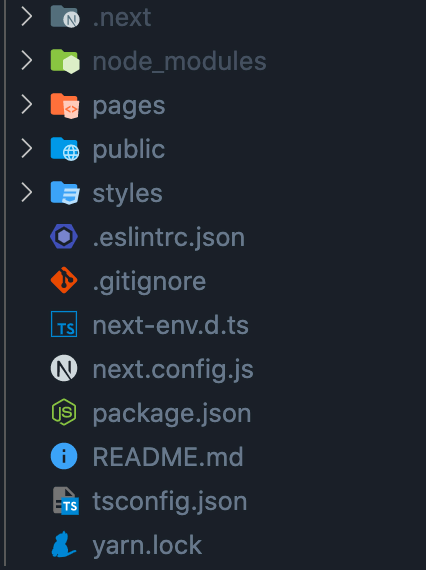
npx create-remix@latest
cd my-app
yarn dev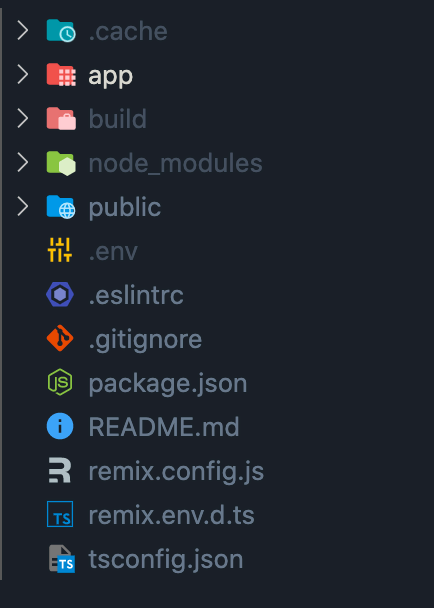
You also see a screenshot of what the project structure looks like. Most of the
time you will be modifying files in the pages or app folder for each
framework. They also have their specific configs (next.config.js,
remix.config.js).
One thing a bit different with Remix is that it exposes the whole html document
and doesn’t hide anything from you. You will see within the app folder there
is a entry.client.tsx and entry.server.tsx. More interesting however is the
root.tsx. This functions as the layout for the entire app and even allows you
to disable JavaScript! The Remix team is high on progressive enhancement so the
app still works even without JavaScript. In Next layout is a bit more complex
and you have to modify a special _app.tsx file.
File based Routing
File based routing is a bit controversial. Some people like the simplicity of it
and others prefer not having their routes map to a file. Dynamic routing is a
bit tricky but it is possible using filenames like [id].tsx or $id.tsx as
shown in the code snippet below.
Note: Each of the code snippets following this has the name and path of the file commented at the top so you know where to put the code.
// pages/todos.tsx

import TodoDetails from "../components/TodoDetails";
import TodoLayout from "../layouts/TodoLayout";

export default function Todos() {
  return (
    <TodoLayout>
      <TodoDetails />
    </TodoLayout>
  );
}
// layouts/TodoLayout.tsx
import Link from "next/link";
import { ReactNode } from "react";
type TodoLayoutProps = {
children: ReactNode;
};
export default function TodoLayout({ children }: TodoLayoutProps) {
return (
<div>
<h1>Todos</h1>
<div className="header">
<ul>
<li>
<Link href="/todos/1">Item 1</Link>
</li>
<li>
<Link href="/todos/2">Item 2</Link>
</li>
<li>
<Link href="/todos/3">Item 3</Link>
</li>
</ul>
</div>
{children}
</div>
);
}// components/TodoDetails.tsx
export default function TodosDetails() {
return (
<div>
<h2>Pick an Item</h2>
</div>
);
}// pages/todos/[id].tsx
import { useRouter } from "next/router";
import TodoLayout from "../../layouts/TodoLayout";
export default function TodosDetails() {
const router = useRouter();
return (
<TodoLayout>
<h2>Item {router.query.id}</h2>
</TodoLayout>
);
}
// app/routes/todos.tsx

import { Outlet } from "@remix-run/react";
import { Link } from "remix";

export default function Index() {
  return (
    <div>
      <h1>Todos</h1>
      <div className="header">
        <ul>
          <li>
            <Link to="/todos/1">Item 1</Link>
          </li>
          <li>
            <Link to="/todos/2">Item 2</Link>
          </li>
          <li>
            <Link to="/todos/3">Item 3</Link>
          </li>
        </ul>
      </div>
      <Outlet />
    </div>
  );
}
// app/routes/todos/index.tsx
export default function TodosIndex() {
return (
<div>
<h2>Pick an Item</h2>
</div>
);
}// app/routes/todos/$id.tsx
import { useParams } from "@remix-run/react";
export default function TodosDetails() {
const params = useParams();
return (
<div>
<h2>Item {params["id"]}</h2>
</div>
);
}As you can see this particular layout is a bit easier in Remix. You only have to
add three files where Next requires you add four. It isn’t just the number of
files but the complexity of them. Remix’s secret sauce is nested routing. A
parent route just defines an <Outlet /> where its child route will end up. In
Next we are required to hand bomb this a bit more ourself by wrapping our code
in a layout component.
The other thing to note is how easy it is to pull the id out of the dynamic
route path using useRouter and useParams.
Easier data fetching (static)
Data fetching is at the heart of most apps. You will most likely be calling an
api at some point. Client side fetching is something both of these frameworks
leave up to you to handle. You can use a raw fetch query in a useEffect, or
a library like React Query, SWR, or RTK Query. What I find with Remix is that
client side fetching is rarely necessary. We can usually provide our data from
the server using loaders or in Next’s case getServerSideProps.
Let’s start by getting some static data from the server.
// pages/todos.tsx

import TodoDetails from "../components/TodoDetails";
import TodoLayout from "../layouts/TodoLayout";

export type Todo = {
  id: number;
  title: string;
};

type TodosProps = {
  todos: Todo[];
};

export default function Todos({ todos }: TodosProps) {
  return (
    <TodoLayout todos={todos}>
      <TodoDetails />
    </TodoLayout>
  );
}

export async function getServerSideProps() {
  return {
    props: {
      todos: [
        { id: 1, title: "Item 1" },
        { id: 2, title: "Item 2" },
        { id: 3, title: "Item 3" },
      ],
    },
  };
}
// pages/layouts/TodoLayout.tsx
import Link from "next/link";
import { ReactNode } from "react";
import { Todo } from "../pages/todos";
type TodoLayoutProps = {
children: ReactNode;
todos: Todo[];
};
export default function TodoLayout({ children, todos }: TodoLayoutProps) {
return (
<div>
<h1>Todos</h1>
<div className="header">
<ul>
{todos.map((todo) => (
<li key={todo.id}>
<Link href={`/todos/${todo.id}`}>{todo.title}</Link>
</li>
))}
</ul>
</div>
{children}
</div>
);
}// pages/todos/[id].tsx
import { useRouter } from "next/router";
import TodoLayout from "../../layouts/TodoLayout";
import { Todo } from "../todos";
type TodoDetailsProps = {
todos: Todo[];
};
export default function TodosDetails({ todos }: TodoDetailsProps) {
const router = useRouter();
return (
<TodoLayout todos={todos}>
<h2>Item {router.query.id}</h2>
</TodoLayout>
);
}
export async function getServerSideProps() {
return {
props: {
todos: [
{ id: 1, title: "Item 1" },
{ id: 2, title: "Item 2" },
{ id: 3, title: "Item 3" },
],
},
};
}
// app/routes/todos.tsx

import { Outlet } from "@remix-run/react";
import { Link, useLoaderData } from "@remix-run/react";
import type { LoaderFunction } from "remix";

export type Todo = {
  id: number;
  title: string;
};

export const loader: LoaderFunction = async () => {
  return [
    { id: 1, title: "Item 1" },
    { id: 2, title: "Item 2" },
    { id: 3, title: "Item 3" },
  ];
};

export default function Index() {
  const todos = useLoaderData<Todo[]>();
  return (
    <div>
      <h1>Todos</h1>
      <div className="header">
        <ul>
          {todos.map((todo) => (
            <li key={todo.id}>
              <Link to={`/todos/${todo.id}`}>{todo.title}</Link>
            </li>
          ))}
        </ul>
      </div>
      <Outlet />
    </div>
  );
}
As you can see because of nested routing Remix has a leg up. You will notice we
had to define the getServerSideProps function twice where in Remix we could
define just one loader. The other thing to note is Next requires your data
object be wrapped in an additional object property called props. As well, Next
passes the data as props to the component where in Remix you call a
useLoaderData hook.
Note: The loader and getServerSideProps functions can only be defined in
page components.
Easier data fetching (from db)
We rarely use static data, so let’s integrate with a database. The power of
getServerSideProps and loaders are they are on the server and just pass data
to the component at runtime. They get stripped out of the bundle completely and
just run as a server that have a contract with our components. No need for an
intermediate api!
Let’s use Prisma for our ORM to connect to
a SQLite db. This gets a bit more complicated as we have to install prisma,
and @prisma/client but the commands below walk you through it.
yarn add --dev prisma
npx prisma init
// prisma/schema.prisma
generator client {
provider = "prisma-client-js"
}
datasource db {
provider = "sqlite"
url = "file:./dev.db"
}
model Todo {
id Int @id @default(autoincrement())
title String
}yarn add @prisma/client
npx prisma generate
npx prisma db pushsqlite3 prisma/dev.db
INSERT INTO todo VALUES (1, 'Item 1');
INSERT INTO todo VALUES (2, 'Item 2');
INSERT INTO todo VALUES (3, 'Item 3');// pages/todos.tsx
import { PrismaClient } from "@prisma/client";
// ...(rest of component)
export async function getServerSideProps() {
const prisma = new PrismaClient();
const todos = await prisma.todo.findMany();
return {
props: {
todos,
},
};
}
// ...(rest of component)// pages/todos/[id].tsx
import { PrismaClient } from "@prisma/client";
import { GetServerSideProps } from "next";
// ...(rest of component)
export const getServerSideProps: GetServerSideProps = async ({ params }) => {
const prisma = new PrismaClient();
const todos = await prisma.todo.findMany();
let todo = null;
if (params?.id) {
todo = await prisma.todo.findFirst({ where: { id: +params.id } });
}
return {
props: {
todos,
todo,
},
};
};
// ...(rest of component)
yarn add --dev prisma
npx prisma init
// prisma/schema.prisma
generator client {
provider = "prisma-client-js"
}
datasource db {
provider = "sqlite"
url = "file:./dev.db"
}
model Todo {
id Int @id @default(autoincrement())
title String
}yarn add @prisma/client
npx prisma generate
npx prisma db pushsqlite3 prisma/dev.db
INSERT INTO todo VALUES (1, 'Item 1');
INSERT INTO todo VALUES (2, 'Item 2');
INSERT INTO todo VALUES (3, 'Item 3');// app/routes/todos.tsx
import { PrismaClient } from "@prisma/client";
export const loader: LoaderFunction = async () => {
const prisma = new PrismaClient();
const todos = await prisma.todo.findMany();
return todos;
};
// ...(rest of component)// app/routes/todos/$id.tsx
import { PrismaClient } from "@prisma/client";
import type { LoaderFunction } from "remix";
import { useLoaderData } from "@remix-run/react";
import type { Todo } from "../todos";
export const loader: LoaderFunction = async ({ params }) => {
const prisma = new PrismaClient();
const todo = await prisma.todo.findFirst({ where: { id: +params.id } });
return todo;
};
export default function TodosDetails() {
const todo = useLoaderData<Todo>();
return (
<div>
<h2>{todo.title}</h2>
</div>
);
}Above we have set up our db, and also connected to it directly from our app from
getServerSideProps and loaders. Now normally you wouldn’t instantiate a new
instance of the PrismaClient every time but we will do it for now for
simplicity sake. Other than that not too much new here other than Prisma
specific stuff which we aren’t focusing on.
Simplified data writes (actions)
You know above that I said Remix’s secret was nested routing? I think actions
kinda fly under the radar. They simplify data writes big time, but they require
a mindset shift. Remember the <form> and <input type="hidden"> tags? They
will become your best friend when using Remix. This abstraction reduces the use
of useState and useEffect hooks as a side effect.
In the following code snippets we add delete functionality.
// pages/todos/[id].tsx

import { PrismaClient } from "@prisma/client";
import { GetServerSideProps } from "next";
import { FormEvent, useState } from "react";
import TodoLayout from "../../layouts/TodoLayout";
import { Todo } from "../todos";
import { useRouter } from "next/router";

type TodoDetailsProps = {
  todos: Todo[];
  todo: Todo;
};

export default function TodosDetails({ todos, todo }: TodoDetailsProps) {
  const router = useRouter();
  const [id, setId] = useState(todo.id);
  const handleSubmit = async (event: FormEvent<HTMLFormElement>) => {
    event.preventDefault();
    const res = await fetch("http://localhost:3000/api/deleteTodo", {
      method: "post",
      body: JSON.stringify({
        id,
      }),
    });

    const json = await res.json();

    if (json.success) {
      router.push("/todos");
    }
  };
  return (
    <TodoLayout todos={todos}>
      <h2>{todo.title}</h2>
      <form method="post" onSubmit={handleSubmit}>
        <input
          type="hidden"
          name="id"
          defaultValue={id}
          onChange={(e) => setId(+e.target.value)}
        />
        <button type="submit">Delete</button>
      </form>
    </TodoLayout>
  );
}

// ...(getServerSideProps function)
// pages/api/deleteTodo.ts
import { PrismaClient } from "@prisma/client";
import type { NextApiRequest, NextApiResponse } from "next";
export default async function handler(
request: NextApiRequest,
response: NextApiResponse
) {
const json = JSON.parse(request.body);
const prisma = new PrismaClient();
await prisma.todo.delete({ where: { id: json.id } });
return response.json({ success: true });
}
// app/routes/todos/$id.tsx

import { PrismaClient } from "@prisma/client";
import { useLoaderData } from "@remix-run/react";
import { Form } from "@remix-run/react";
import type { Todo } from "../todos";
import type { ActionFunction, LoaderFunction } from "remix";
import { redirect } from "remix";

// ...(loader function)

export const action: ActionFunction = async ({ request }) => {
  //@ts-expect-error
  const formData = await request.formData();
  const id = +formData.get("id");

  const prisma = new PrismaClient();
  await prisma.todo.delete({ where: { id } });

  return redirect("/todos");
};

export default function TodosDetails() {
  const todo = useLoaderData<Todo>();
  return (
    <div>
      <h2>{todo.title}</h2>
      <Form method="post">
        <input type="hidden" name="id" value={todo.id} />
        <button type="submit">Delete</button>
      </Form>
    </div>
  );
}
On the left is what you are probably used to doing. Tracking the state of our id
input with useState, then doing a fetch to an endpoint of ours. We are lucky
in this case that creating this endpoint is fairly easy.
On the right its so much simpler. You define an action function similar to
loader that does the deleting based on the formData that was submitted. The
entire form is serialized and sent to the backend without any manual tracking of
state. By default the <Form> tag calls the action of the current page, but you
can use <Form action="some-other-page"> to post to a different action. It is
also neat that Remix can tell what parts of your app have been updated by this
action and will update the ui accordingly. No need to invalide caches
manually!
Improved error handling
Inevitably we run into errors in our app. I’m sure we have all come across the
white screen of death due to an undefined variable at some point in our
JavaScript career. Frameworks like these handle these errors more gracefully. In
Remix’s case we can just export an ErrorBoundary and just that one nested part
of our app will show an error while parent routes will function normally. In
Next things are more complicated so I would suggest you read up on
error
boundaries in the docs
// no easy solution
// pages/todos/$id.tsx

import {
  ErrorBoundaryComponent,
  Links,
  Meta,
  Scripts,
} from "remix";

// ...(rest of component)

export function ErrorBoundary({ error }: ErrorBoundaryComponent) {
  console.error(error);
  return (
    <html>
      <head>
        <title>Oh no!</title>
        <Meta />
        <Links />
      </head>
      <body>
        <p>Nice error screen</p>
        <Scripts />
      </body>
    </html>
  );
}
Increased Performance
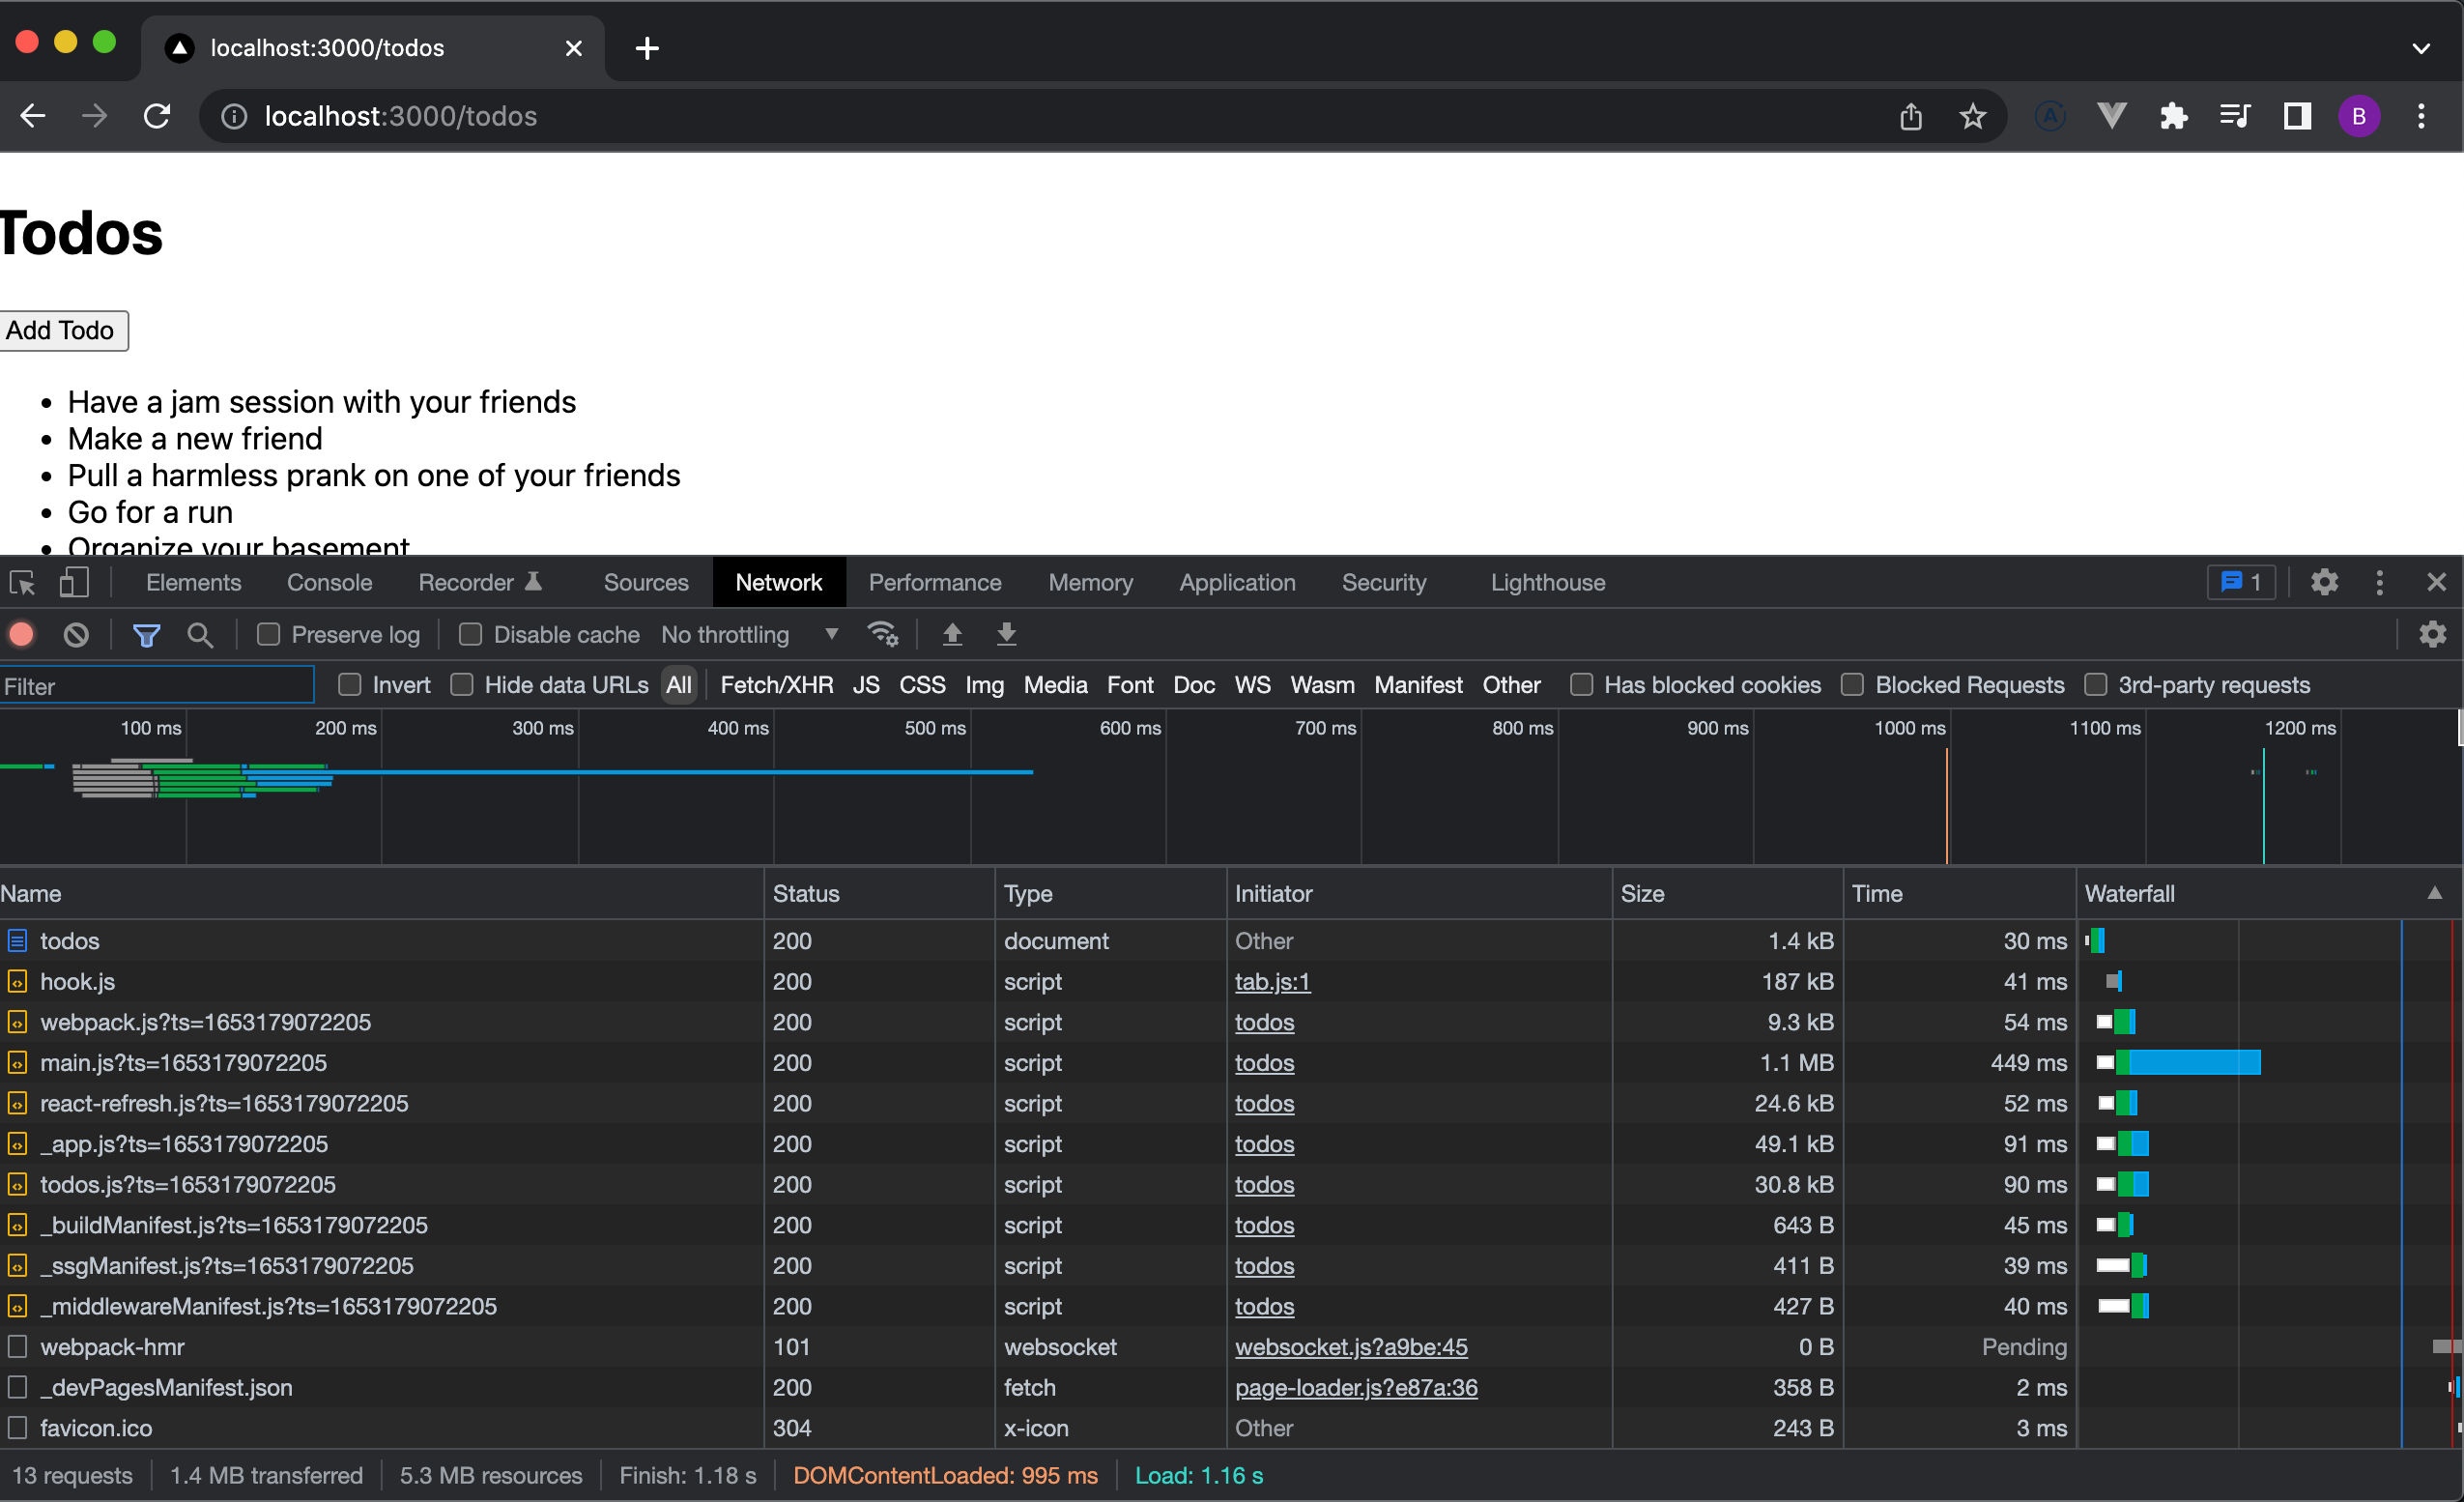
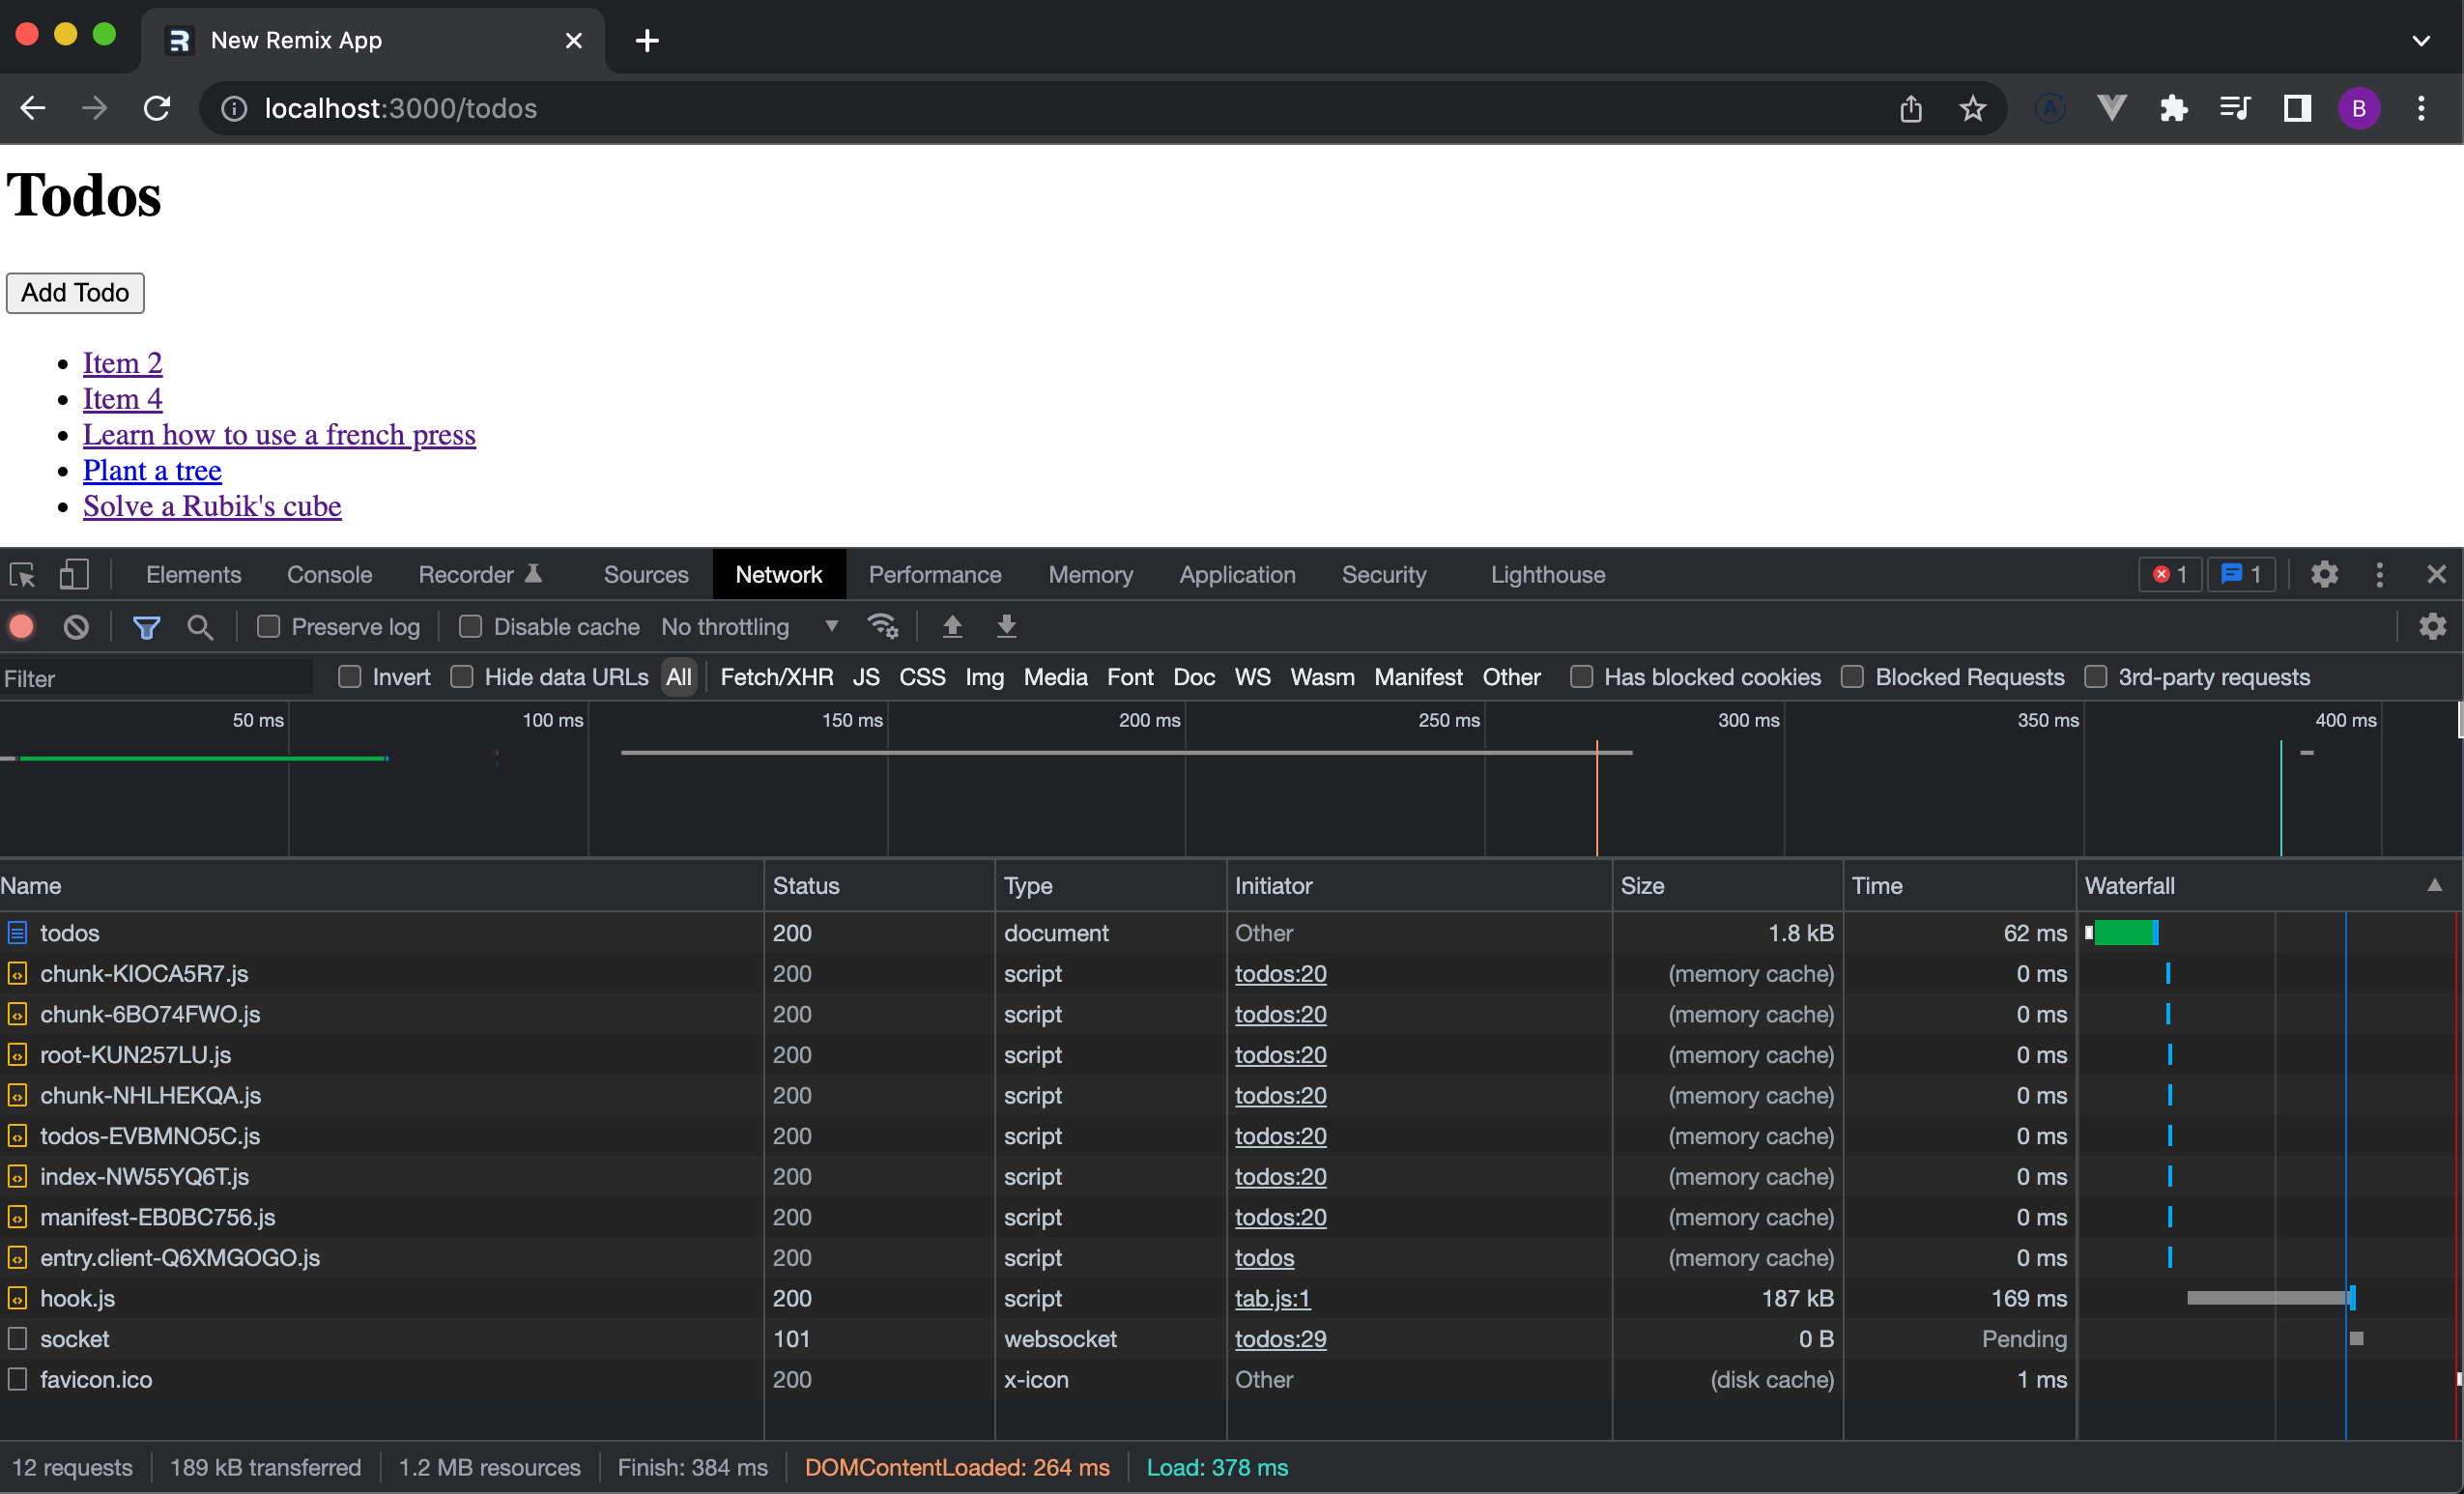
Performance between these two frameworks is another hotly contested topic. Does SSG or SSR win? Looking at the below screenshots for our mickey mouse app, we see that Remix seems to outperform Next. Please take this with a grain of salt as this is not official at all.
Remix loaded in 378ms, while Next took 1.16s. In the links section at the end of this article, @RyanFlorence has an article with a more in depth comparison.
Bonus Points (add todo functionality)
To add some fun to our app I figured we could create add todo functionality that pulls from the bored api.. No new concepts here but I’d suggest trying this out yourself and seeing which framework’s mindset works better for you. If you get stuck feel free to look at the code below.
// pages/layouts/TodoLayout.tsx

import Link from "next/link";
import { ReactNode } from "react";
import { Todo } from "../pages/todos";
import { useRouter } from "next/router";

type TodoLayoutProps = {
  children: ReactNode;
  todos: Todo[];
};

export default function TodoLayout({ children, todos }: TodoLayoutProps) {
  const router = useRouter();
  const handleOnClick = async () => {
    const res = await fetch("http://localhost:3000/api/addTodo", {
      method: "post",
    });

    const json = await res.json();

    if (json.success) {
      router.push("/todos");
    }
  };
  return (
    <div>
      <h1>Todos</h1>
      <div className="header">
        <button onClick={handleOnClick}>Add Todo</button>
        <ul>
          {todos.map((todo) => (
            <li key={todo.id}>
              <Link href={`/todos/${todo.id}`}>{todo.title}</Link>
            </li>
          ))}
        </ul>
      </div>
      {children}
    </div>
  );
}
// pages/api/addTodo.ts
import { PrismaClient } from "@prisma/client";
import type { NextApiRequest, NextApiResponse } from "next";
export default async function handler(
request: NextApiRequest,
response: NextApiResponse
) {
const prisma = new PrismaClient();
const res = await fetch("https://www.boredapi.com/api/activity");
const json = await res.json();
await prisma.todo.create({
data: {
title: json.activity,
},
});
return response.json({ success: true });
}
// app/routes/todos.tsx

import { PrismaClient } from "@prisma/client";
import { Outlet } from "@remix-run/react";
import { Link, useLoaderData, Form } from "@remix-run/react";
import type { ActionFunction, LoaderFunction } from "remix";
import { redirect } from "remix";

export type Todo = {
  id: number;
  title: string;
};

export const loader: LoaderFunction = async () => {
  const prisma = new PrismaClient();
  const todos = await prisma.todo.findMany();
  return todos;
};

export const action: ActionFunction = async () => {
  const prisma = new PrismaClient();
  const res = await fetch("https://www.boredapi.com/api/activity");
  const json = await res.json();

  await prisma.todo.create({
    data: {
      title: json.activity,
    },
  });

  return redirect("/todos");
};

export default function Index() {
  const todos = useLoaderData<Todo[]>();
  return (
    <div>
      <h1>Todos</h1>
      <div className="header">
        <Form method="post">
          <button type="submit">Add Todo</button>
        </Form>
        <ul>
          {todos.map((todo) => (
            <li key={todo.id}>
              <Link to={`/todos/${todo.id}`}>{todo.title}</Link>
            </li>
          ))}
        </ul>
      </div>
      <Outlet />
    </div>
  );
}
Conclusion
In conclusion, both of these frameworks are great and have their purpose. If you require SSG then your best bet is Next. Next is also a bit more popular at this time so you can find more resources on it. It allows a hybrid approach which is still one of a kind. Opting into SSG or SSR on a per page basis is great.
Remix on the other hand seems to be the right choice for SSR apps. Nested routing, actions, easier error boundaries, and typescript by default are the main advantages. You also don’t lose anything on the data fetching side with loaders.
Another thing to notice is the lack of useEffect and useState especially in
Remix. All the data fetching is done server side so it is available on component
mount. I don’t know about you but I enjoy this. Especially with React 18 on the
horizon and the changes to useEffect. This
talk
by @DavidKPiano is great on this
topic.
The other thing Remix does better is give you hooks for pending and optimistic ui but I will let you explore that on your own.
Links To Learn More
• Next Docs
• Remix Docs
•
Remix vs Next
•
Building
an Image Gallery with Next.js, Supabase, and Tailwind CSS